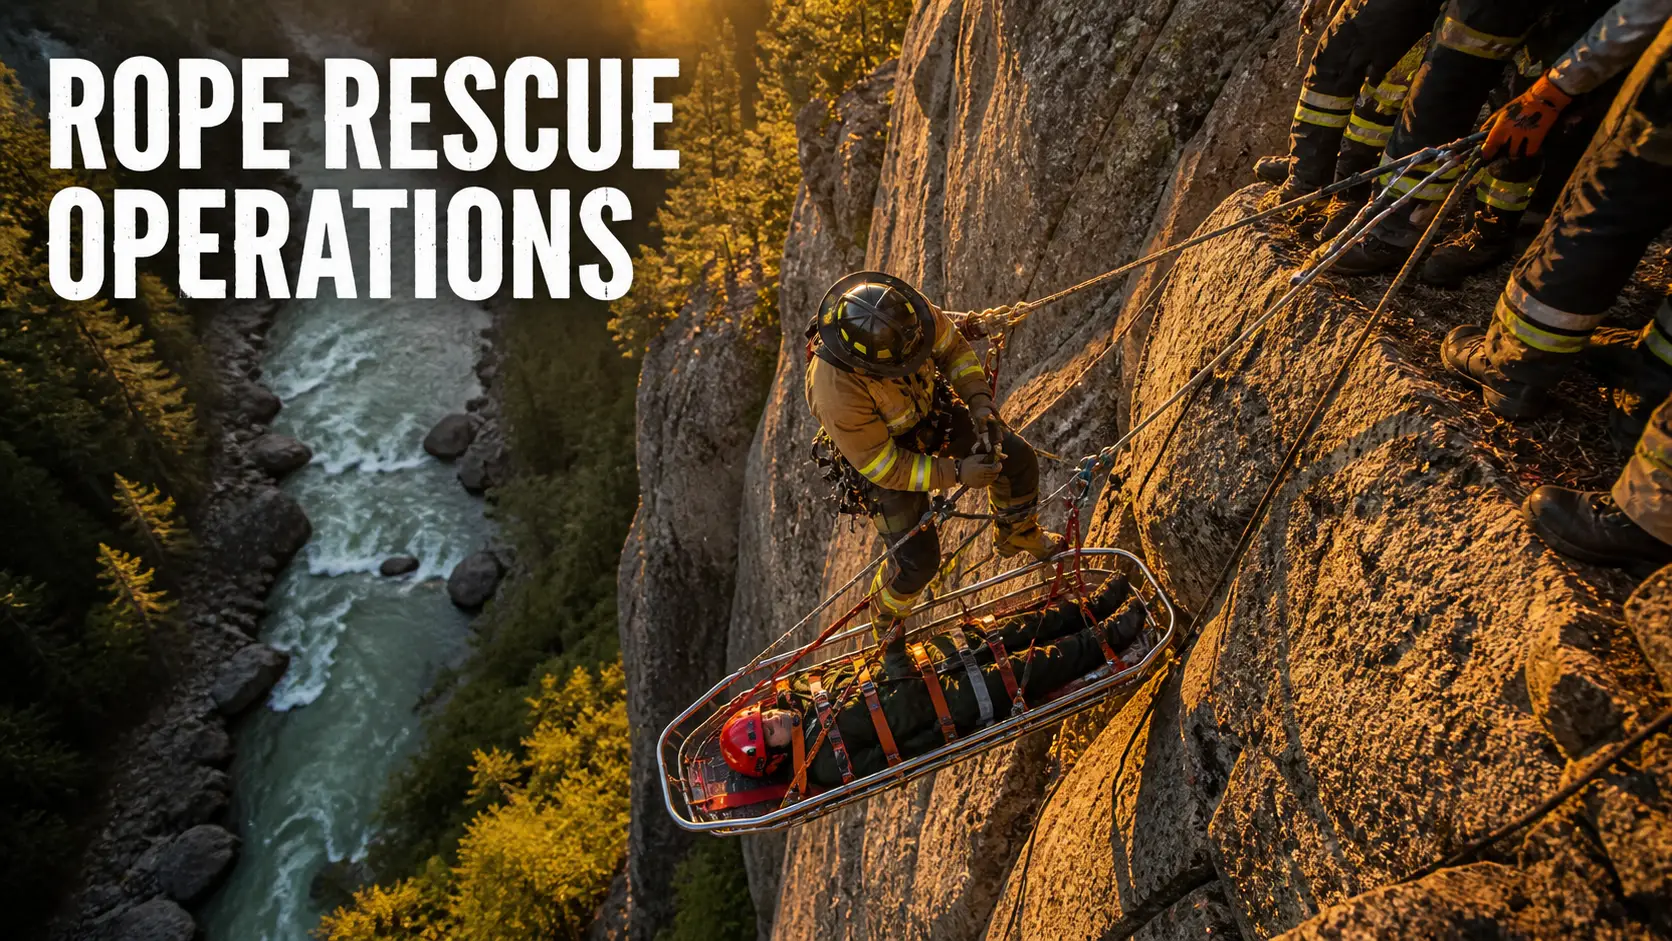

Rope rescue is one of the most technically demanding disciplines in the fire service — and one of the most frequently needed in both urban and rural environments. Victims trapped on cliff faces, in elevator shafts, below highway overpasses, in construction excavations, and on steep slopes all require rope rescue capability. Every firefighter should understand the foundational concepts of rope systems, even if full technician-level operations require a specialist team. This guide covers the complete operational picture: high-angle vs. low-angle classification, essential knots and their field applications, mechanical advantage systems, anchor building, patient packaging, certification levels, and the size-up process for rope rescue incidents.
Jump to section:
- 1. High-Angle vs. Low-Angle: What It Means Operationally
- 2. Life-Safety Rope: Types, Ratings, and Inspection
- 3. Essential Knots for Rope Rescue
- 4. Anchor Systems: Building a Bombproof Anchor
- 5. Mechanical Advantage Systems
- 6. Patient Packaging for Rope Rescue
- 7. NFPA 1006 Rope Rescue Certification Levels
- 8. Specific Rescue Scenarios
- 9. Rope Rescue Size-Up Checklist
- FAQ
1. High-Angle vs. Low-Angle: The Foundational Classification
Every rope rescue operation begins with an angle classification, because the angle of the rescue slope determines which systems, techniques, and personnel resources are required. Getting this classification wrong leads to using the wrong system for the terrain — which is how rescuers and patients are dropped.
| Classification | Slope Angle | Load on Rope System | Rescuer Position | Primary Technique |
|---|---|---|---|---|
| Low-angle | 0° – 30° | Most load on rescuers' feet; rope provides balance and belay | Walking/scrambling on slope | Litter carry with belay rope, rescuers walk |
| Steep low-angle | 30° – 45° | Shared between feet and rope; rope critical for stability | Scrambling, hands used on slope | Litter lower/raise with haul system assist |
| High-angle | 45° – 90° | Virtually all load on rope system; rescuers suspended | Suspended on rope, no foot support | Two-rope system (main + belay), mechanical advantage raise |
| Vertical | 90° | 100% on rope system | Fully suspended | Two-rope system, controlled lower or mechanical raise |
The 30° threshold is the critical operational decision point. Below 30°, rescuers can provide significant ground support to litter movement and the rope system functions primarily as a safety belay. Above 30°, the rope system carries an increasingly large fraction of the load, and the technical requirements of the rope system increase accordingly. Above 45°, ground support is essentially zero and the rope system carries everything — this is true high-angle rescue requiring full two-rope system deployment and mechanical advantage.
When in doubt, classify up. If you cannot clearly determine whether an angle is low or high, treat it as high-angle. A high-angle system deployed on a low-angle slope is redundant but safe. A low-angle approach deployed on a high-angle slope is a single-point failure waiting to kill someone.
2. Life-Safety Rope: Types, Ratings, and Inspection
Not all rope is rescue rope. The rope used for life-safety rescue operations in the U.S. fire service is governed by NFPA 1983 (Standard on Life Safety Rope and Equipment for Emergency Services). Using rope that does not meet NFPA 1983 for life-safety operations is not a technique shortcut — it is a fundamental safety failure.
NFPA 1983 rope classifications
- Light Use (L): Minimum breaking strength 4,500 lbf. For one-person load (rescuer only, no patient). Diameter typically 9–10.5mm.
- General Use (G): Minimum breaking strength 9,000 lbf. For two-person load (rescuer plus patient). Standard for most rescue operations. Diameter typically 12.5–13mm.
Kernmantle rope construction
Life-safety rescue rope is kernmantle construction: a braided or twisted core (kern) that carries 70–80% of the load, surrounded by a woven protective sheath (mantle) that protects the core from abrasion, UV, and contamination. The sheath provides visual inspection capability — sheath damage does not always indicate core damage, but any sheath damage triggers mandatory rope retirement from life-safety use. You cannot inspect the kern without destructive testing.
Static vs. dynamic rope
- Static rope (low-elongation): Stretches less than 6% under load. Used for rescue hauling, lowering, and belay systems. Predictable and controllable under load. Standard for fire service rescue operations.
- Dynamic rope: Designed to elongate 20–40% under shock load to absorb fall energy. Used in climbing for fall arrest. Not appropriate for rescue hauling or lowering — the elongation makes control of patient position difficult and the rope behavior under load is unpredictable in rescue rigging.
Rope inspection and retirement
Inspect life-safety rope before and after every use. Run the entire length through gloved hands feeling for: soft spots (core damage), lumps (core bunching), stiff sections (contamination or heat damage), cuts or abrasion through the sheath, and any discoloration suggesting chemical exposure. Any rope that fails inspection is immediately retired from life-safety use, cut into short sections to prevent accidental reuse, and replaced. Document every inspection and every incident the rope was used in.
Rope retirement triggers — any single one is sufficient: sheath damage exposing the kern; any fall arrest or shock-load event; chemical contamination (fuel, solvents, acids, battery acid); heat exposure near or above 300°F; more than 10 years from manufacture date; inability to trace the complete use history; any inspection that produces doubt. Doubt is a retirement trigger.
3. Essential Knots for Rope Rescue
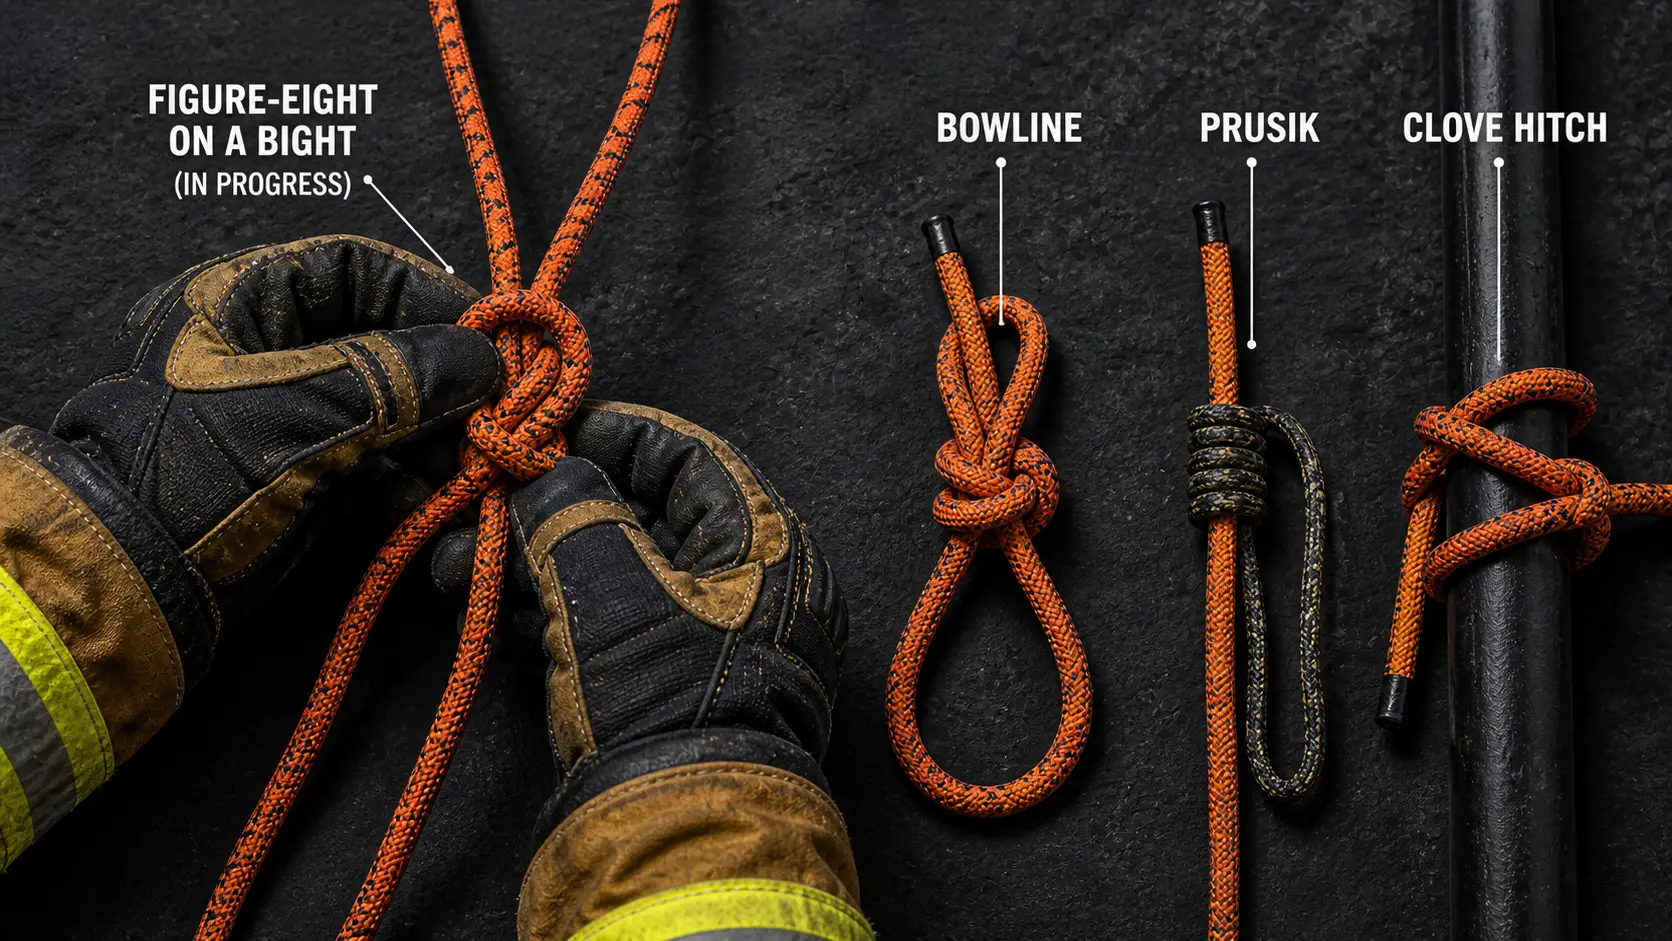
A rope rescue system is only as strong as its weakest knot. Every knot reduces rope strength by 20–50% depending on knot type and quality of dressing. The knots in use at any rescue operation must be: appropriate for the application, correctly tied and fully dressed, independently inspected before the system is loaded, and retied if there is any doubt. The following are the essential knots for fire service rope rescue operations.
Knot dressing and inspection
A correctly tied knot that is not properly dressed (all strands parallel and snug, no crossings or twists) can fail at significantly lower loads than its rated strength. Every knot must be: tied, dressed by the tier, then independently inspected by a second rescuer before the system is loaded. This is not optional or time-permitting — it is a mandatory step in every rope rescue system build. Implement a verbal inspection protocol: “Knot check complete” stated by the inspector before any loading.
4. Anchor Systems: Building a Bombproof Anchor
An anchor is only as strong as the weakest point in the anchor system — and the weakest point is often not the rope or the hardware, but the anchor point itself. A 30,000 lbf-rated rope tied to a 4-inch diameter rotted tree trunk is not a strong anchor. Anchor selection and construction is the most consequential decision in a rope rescue system build.
Anchor point selection hierarchy
- Engineered anchors: Structural steel beams, concrete columns, vehicle frames, purpose-built rescue anchor hardware. Highest confidence. Use when available.
- Natural anchors: Live trees (minimum 12-inch diameter, healthy, well-rooted), large boulders (stable, not perched). Test by pushing — if it moves at all, it is not an anchor.
- Multi-point equalized anchor: When no single high-confidence anchor point is available, distribute the load across multiple lower-confidence points using an equalized anchor system. A properly equalized two-point anchor with two 4-inch trees can be as reliable as a single large tree.
- Picket systems: For non-rocky ground without trees or structures. Multiple T-stakes or pickets driven at angles and connected. Labor-intensive and slower to build; used when no other anchor is available.
Equalized anchor systems
An equalized anchor distributes load equally between multiple anchor points, reducing the force on any single point and providing redundancy if one point fails. Key principles:
- Self-equalizing (sliding X, Magic X): The anchor automatically equalizes between two points as the load direction changes. Provides true equalization but has a larger extension distance if one anchor fails. Used in SERENE-A systems.
- Pre-equalized (fixed point): The anchor is equalized at one specific load direction and fixed. Does not self-adjust. Lower extension if one anchor fails. More common in fire service rescue operations where load direction is predictable.
- SERENE-A criteria: Solid, Efficient, Redundant, Equalized, No Extension (or manageable), Angles less than 120°. Apply these criteria to every anchor system before loading. The angle between anchor legs is critical — as the angle between legs increases beyond 60°, the force on each anchor point increases rapidly. At 120°, each anchor point experiences 100% of the load. Keep anchor angles below 60° when possible.
Hardware: carabiners, plates, and descenders
- Locking carabiners: Minimum NFPA 1983-rated, screwgate or auto-lock mechanism. Always load along the major axis (spine), never along the minor axis (gate side). A carabiner loaded on the gate can fail at 10–20% of its major-axis rating.
- Rescue-rated pulleys: Minimum 36kN (8,000 lbf) working load. Sealed bearings for efficiency in hauling systems. Side plates that allow rigging without threading rope ends (side-access pulleys).
- Descender/belay device: Rack descenders, tube-style devices, or dedicated rescue descenders (Petzl I'D, CMC MPD) for controlled patient lowering. Rack descenders allow load-adjustable friction and one-hand control with hands-free locking capability.
5. Mechanical Advantage Systems
A mechanical advantage (MA) system multiplies the input force applied to a haul system. This allows a small number of rescuers to raise a loaded patient litter that would otherwise require far more personnel. Understanding MA systems is essential for any rope rescue technician and valuable for operations-level personnel who may need to assist a technician team.
The Z-rig (3:1): the standard rescue haul
The Z-rig is the most commonly used haul system in fire service rope rescue because it is fast to build, uses minimal equipment, and provides sufficient mechanical advantage for most two-rescuer patient raises. Build sequence:
Efficiency losses
Theoretical mechanical advantage is reduced by friction in pulleys and rope-on-rope contact. A well-built 3:1 Z-rig with sealed bearing pulleys operates at approximately 2.5:1 actual mechanical advantage due to friction. A Z-rig with low-quality pulleys or excessive rope contact points can drop to 2:1 or lower. Use sealed-bearing rescue-rated pulleys, minimize directional changes, and keep rope runs as straight as possible to preserve efficiency.
6. Patient Packaging for Rope Rescue
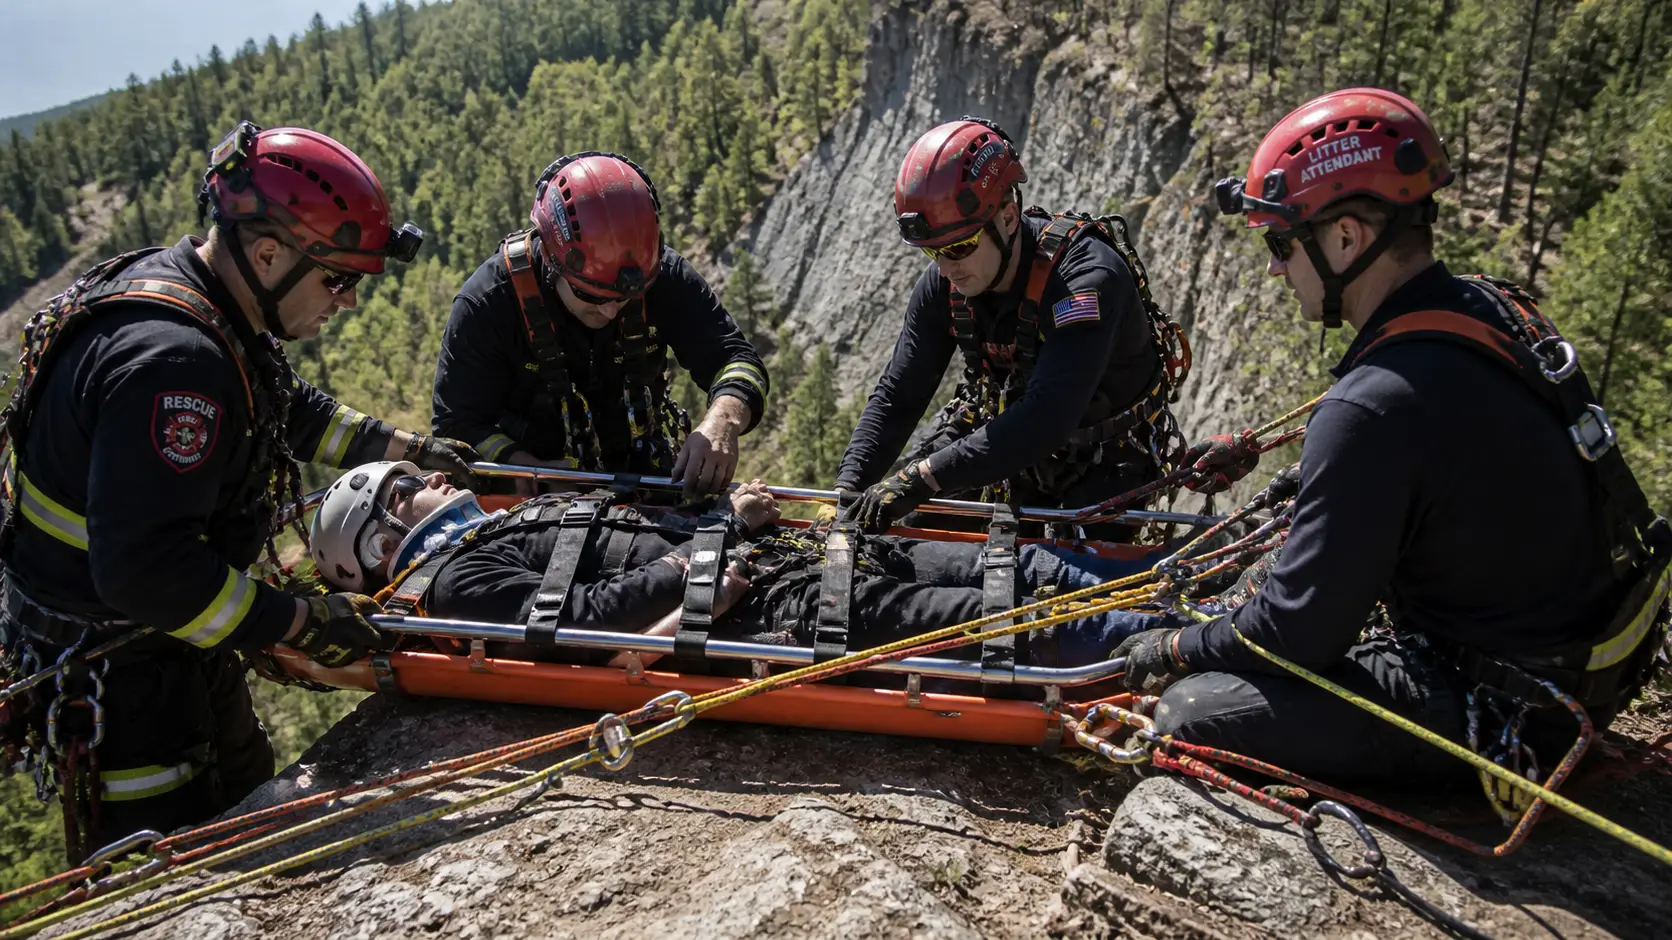
Patient packaging is the process of securing the patient in the litter and connecting the litter to the rope system in a way that: maintains spinal precautions if indicated, keeps the patient secure during movement in any orientation, allows rescuer access to the patient during the rescue, and connects the patient to the rope system through rated, inspectable hardware.
Litter selection
- Stokes basket (wire or poly): Standard litter for most rope rescue applications. Wire Stokes allows rescuer hand access through the sides. Poly Stokes is more comfortable for the patient in environments with sharp terrain but limits access. Both require a compatible harness system for patient attachment.
- SKED stretcher: Flexible plastic wrap-around litter for confined space and narrow passage rescue. Allows extraction through 18-inch diameter openings. Limited rigid spine support.
- Flexible litter (Spar pole, mil-spec): For confined spaces and situations where rigid litters cannot be maneuvered.
Patient attachment in the litter
The patient must be attached to the litter with a harness system that transfers the load directly to the litter frame — not through the patient's body alone. A patient who is only strapped into a litter without a harness connection can slide out or experience dangerous internal pressure if the litter goes head-down. Use a purpose-built litter patient harness (CMC, Pigeon Mountain, or equivalent) or construct an improvised harness from webbing with a minimum of two independent attachment points to the litter frame.
Spinal precautions
Treat every rope rescue patient as a potential spinal injury until ruled out by examination or mechanism of injury. Apply a cervical collar if available. Pad the patient's head inside the litter. Minimize litter rotation and tipping during the rescue. A litter attendant accompanying the patient during a high-angle lower or raise is the best means of maintaining spinal protection — the attendant can stabilize the patient's head, monitor airway, and communicate patient status to the haul team.
The two-rope system
High-angle patient rescue always uses a two-rope system: a main line that controls the lowering or raising, and an independent belay line that catches the load if the main line fails. The two lines must be attached to independent anchors (or to two independently rated anchor points), and must be managed by separate teams or devices so a failure in one system does not propagate to the other. A belay device or prusik on the belay line must be tended continuously throughout the operation.
7. NFPA 1006 Rope Rescue Certification Levels
Rope rescue professional qualifications in the U.S. are governed by NFPA 1006 (Standard for Technical Rescuer Professional Qualifications). Three operational levels apply to rope rescue, with clear delineation of authorized operations at each level.
| Level | Authorized Operations | Typical Training Hours | Annual Recertification |
|---|---|---|---|
| Awareness | Recognize rope rescue hazards; establish scene control; summon resources; perform non-entry support. Cannot rig rope systems or perform rescue operations. | 4–8 hours | Not required but recommended annually |
| Operations | Low-angle rescue (below 30°); simple belay systems; litter carries on slopes; patient packaging assistance; haul team member under technician supervision. Cannot independently build high-angle systems. | 24–40 hours | Annual skills maintenance required |
| Technician | All rope rescue operations including high-angle (above 30°); two-rope systems; anchor construction; MA system design and build; independent litter attendant; patient packaging and harness connection; rescue team leader for rope operations. | 40–80+ hours initial; annual recertification | Mandatory annual practical recertification |
Most line firefighters in the U.S. are trained to Awareness level for rope rescue. Operations level is increasingly included in technical rescue fundamentals courses. Technician level typically requires attendance at a dedicated rope rescue school (CMC Rescue School, Pigeon Mountain Industries, state-level technical rescue programs) and annual practical skills maintenance. Know your department's certified rope rescue level and your mutual aid rope rescue resources before the next rope rescue dispatch.
8. Specific Rope Rescue Scenarios
Cliff and steep terrain rescue
Cliff rescue is the paradigmatic high-angle operation. The key decisions on arrival: anchor location relative to the cliff edge (far enough back from the lip to avoid edge loading the rope), edge protection (rope pads or commercial edge protectors to prevent abrasion and sheath damage at the lip), and lip management (a rescuer or rigging plate at the edge to control rope routing and communicate with the patient and haul team below).
Edge transition — moving the patient litter from the cliff face to the top — is the most mechanically demanding moment of a cliff rescue. The litter must transition from a hanging position below the edge to a horizontal position above it while maintaining patient stability. This requires coordination between the haul team, the litter attendant, and edge personnel. Practice this transition in training; improvising it during a live rescue with a real patient is how injuries occur.
Elevator and shaft rescue
Elevator shaft rescue presents rope rescue requirements in a vertical, enclosed, mechanically complex environment. Key hazards: counterweights (moving and in unpredictable positions), multiple electrical systems (shaft lighting, door mechanisms, motor), and limited anchor options at shaft tops. The elevator car must be confirmed locked out/tagged out before any personnel enter the shaft. Anchor options: structural steel of the shaft structure, machine room beams above the shaft, or purpose-built rescue anchor hardware rated for shaft use. A simple lowering system (rack descender, ATC, or Munter hitch) may be sufficient for shaft rescues where the patient is accessible from above.
Construction and trench-adjacent rope rescue
Construction sites present both elevated rescue scenarios (falls into formwork, structural steel frames, scaffolding) and below-grade scenarios (falls into excavations and shafts). For below-grade rope rescue, the primary hazard is excavation collapse — the same unstable soil that caused the fall will continue to collapse as personnel approach the edge. Soil classification determines safe approach distance. Do not allow personnel to approach the edge of an unshored excavation without soil classification by a competent person. Build anchors well back from the edge and use long rope runs to avoid edge loading near unstable soil.
Tower and wind turbine rescue
Wind turbine rescue is an emerging requirement for departments in agricultural and coastal response areas. Turbine towers range from 80 to 120+ meters tall — far beyond standard rope rescue equipment length. Rescue from turbine nacelles requires specific equipment (multiple rope lengths, mid-rope connections), pre-incident planning with turbine operators (who can provide internal ladder access and lockout/tagout information), and in most cases specialized industrial rescue resources beyond what a typical fire department rope rescue team carries. Pre-plan turbine facilities in your response area before the dispatch comes in.
9. Rope Rescue Size-Up Checklist
Use this checklist on arrival at every rope rescue incident:
- ✓Angle classification — low-angle (<30°), high-angle (>30°), or vertical? Classify up if uncertain.
- ✓Patient status — conscious? Injuries? Spinal precautions indicated?
- ✓Patient access path — above, below, or lateral approach? Litter size restrictions?
- ✓Anchor availability — engineered, natural, or multi-point required? Distance from edge?
- ✓Edge hazards — edge protection required? Lip management position needed?
- ✓Rope length — is your available rope sufficient for the rescue path? (Measure, don't estimate.)
- ✓Certification level — do on-scene personnel have the certified level for the required operations? Technician mutual aid needed?
- ✓Equipment check — life-safety rope (NFPA 1983 rated), locking carabiners, pulleys, descenders, litter, harness, helmets?
- ✓Hazard control — falling object zone below? Spectator/bystander exclusion zone established?
- ✓Medical staging — EMS positioned for immediate patient care on extraction?
- ✓Communications plan — hand signals or radio protocol established between haul team and litter attendant?
- ✓Belay team assigned — independent belay system and dedicated belay team confirmed before main line is loaded?
Useful training tools
Use the SCBA Air Time Calculator to plan air supply for extended rope rescue operations in confined spaces. Use the Shift Calendar Builder to coordinate rope rescue technician training drills across shift schedules. For pre-incident planning of technical rescue sites in your response area, use the Fire Pre-Plan Builder to document anchor options, access routes, and hazards at known high-risk locations before the incident occurs.
Frequently Asked Questions
What is the difference between high-angle and low-angle rope rescue?
The 30° slope angle is the dividing line. Below 30°, most of the patient and rescuer weight is supported by their feet on the slope — the rope provides belay and balance. Above 30°, an increasing fraction of the load transfers to the rope system. Above 45°, virtually all load is on the rope. High-angle rescue requires a full two-rope system (main plus independent belay), mechanical advantage for raising, and technician-level personnel. Low-angle rescue can often be managed at operations level with belay ropes and assisted litter carries.
What is the minimum mechanical advantage system for raising a patient?
A 3:1 mechanical advantage (Z-rig) is the standard minimum for raising a loaded patient litter. In practice, due to friction losses, a well-built 3:1 operates at approximately 2.5:1 actual mechanical advantage. A crew of three to four rescuers can raise a loaded litter with a 3:1. For difficult raises (vertical, heavy patients, minimal crew), compound 6:1 or 9:1 systems are used. The limiting factor at high mechanical advantage is rope travel — the hauling crew must walk a much longer distance to move the load a short distance.
Can I use climbing rope for fire service rope rescue?
No. Climbing rope is dynamic rope — designed to elongate 20–40% under shock load to arrest falls. Fire service rescue rope is static (low-elongation) rope designed for controlled lowering and raising. Dynamic rope in a rescue haul system creates unpredictable patient movement, makes controlled lowering difficult, and does not meet NFPA 1983 requirements. Only NFPA 1983-rated static rescue rope should be used for life-safety rescue operations.
How many anchor points does a rope rescue system need?
The main line and the belay line must each be attached to independent anchor systems. Each anchor system should be either a single high-confidence point (engineered anchor, large live tree) or a multi-point equalized system. A minimum of two independent anchors — one for main, one for belay — is the baseline. If anchor quality is low, three or more anchor points distributed across multiple equalized systems increases redundancy. The goal is that no single point failure results in a life-safety failure.
What knot is used most in fire service rope rescue?
The figure-eight on a bight is the most widely used knot in fire service rope rescue because it is easy to inspect, visually distinctive when correctly tied, retains approximately 75–80% of rope breaking strength, and is accepted by NFPA 1983 for life-safety applications. The figure-eight follow-through is the same knot tied around an object rather than in a bight. Together, these two figure-eight variations cover the majority of rope rescue connection requirements. Every firefighter involved in rope rescue operations should be able to tie both variations correctly in gloves and darkness.
How often does rope rescue equipment need to be inspected?
Life-safety rope requires inspection before and after every use, plus an annual formal inspection documented in the rope's log. Hardware (carabiners, pulleys, descenders) requires inspection before and after every use. Any equipment involved in a fall arrest, shock load, or chemical exposure event is immediately removed from service and inspected by a qualified person before return to use — or retired if the inspection cannot confirm full integrity. Document every inspection. Without documentation, the inspection did not happen for liability purposes.


Comments 0
No comments yet. Be the first to share your thoughts!
Leave a Comment